1.24.2010

Butternut squash pasta

Butternut squash might compete with potatoes for the 0h-so-very-coveted “Christine’s favorite vegetable” title. Those who know me (most if not all readers) know it is astonishing that anything could come anywhere near the mighty potato. Potatoes will always have a place in my heart, but with dishes like Butternut squash cavatappi, the gourds are moving in.

Butternut Squash Cavatappi
makes 3-4 servings

- 1 Medium butternut squash, peeled and cut into 1 ½” cubes
- 2 T butter, melted
- 1 T thyme
- ½ c milk (must have some fat %, and hey - if you put in cream instead I won't tell anyone.)
- ½ c chicken stock (optional)
- 1 t sherry vinegar
- 1/3 c parmagiano reggiano, grated
- ½ lbs. cavatappi (see below)
- 1 chicken breast
- 1 t olive oil, plus more for garnish
- salt and pepper
- Fresh Basil for garnish

Preheat oven to 375F. Toss the butternut squash with the butter, thyme and liberal amounts of salt and pepper on a baking sheet. Roast in the oven for 30-45 minutes (Should be caramelized and sweet).

About 30 minutes into the baking of the butternut squash, boil lots of water for the pasta. Salt the water really well (we’re talking almost a ¼ c of salt) when it comes to a boil. Boil the cavatappi pasta until al dente. Reserve about a cup of the cooking liquid and drain the pasta in a colander and set aside.


Cavatappi means tap extractor (or corkscrew) in Italian. It’s exactly what it sounds like – little curly cues of pasta. The ridges on the outside (rigati, sp?) help the sauce stick to the pasta. Cavatappi is probably my favorite short pasta.

Season the chicken with salt, pepper and olive oil. Grill on medium heat for 15 minutes while you prepare the sauce. It always takes longer than you think to grill chicken breast and I tend to grill it on a lower heat so the outside doesn’t burn before the inside is cooked. After the chicken is cooked, let it rest for 3-5 minutes on a cutting board, then slice.

In the same pasta pot that was used earlier (because I hate dirtying extra dishes) blend the roasted butternut squash, sherry vinegar, ¼ c parm, and milk with an emersion blender. If you don’t have an emersion blender, just use a blender or food processor. Add either the reserved pasta water or chicken stock, if you’ve got it, to thin the sauce out. The sauce should be pretty thick, but still barely pourable. Toss the pasta with the sauce (make sure the pasta comes back up to temp), taste for seasoning, and serve in big bowls. Top with the sliced chicken, reserved parm, fresh basil and a drizzle of the best olive oil you can find.


My Grade: B+ (could use more salt in this particular execution)
Recipe grade: B+
Diagnosis: Affordable and tasty. If you already have the sherry vinegar and olive oil, the entire dish should cost no more than $7 to make. It's a very flexible recipe so if you don't have fresh basil or parm or something, just omit it - it will still be pretty good.

1.23.2010

Eclairs

Central Market loves me. I don’t mean they give me lots of samples (which they do) or that they are nice to me, etc… I mean I am on a first name basis with all employees and 90% of my money goes in their pocket. When I’m lazy I turn to CM for prepared foods – especially their éclairs. Eclairs are a headache to make. You have to plan ahead so the pastry cream has time to chill, the pate a choux though easy to make is hard to tell when it’s done, you have to deal with piping bags… it’s generally a pain. Thus, I usually buy a CM éclair a week to forego the 6 hours it takes to make them. However, at $3.99 a pop, our éclair addiction is fast becoming somewhat like a costly smoking habit. Last weekend I sucked it up and made éclairs. Lots of them. About 40 miniature éclairs, actually. The mini éclairs are the perfect bite size party food and they're so small no one feels guilty about eating just a few of these morsels. The minis did not last a single night amongst friends; they were that good!

Éclairs

Make the cream first:
Lightened Pastry Cream
(from The Joy of Cooking)

1/3 cup sugar
2 Tbsp. all-purpose flour
2 Tbsp. corn starch
4 large egg yolks
1 1/3 cups milk
1 vanilla bean, split or 1 tsp. vanilla extract

1/2 cup heavy cream (not needed until ready to fill pastries)

Chocolate ganache (recipe follows)

Beat the sugar, flour, cornstarch, and egg yolks on high speed until thick and yellow, about 2 minutes.

Meanwhile, heat milk and vanilla bean over medium heat. Remove the vanilla bean. Gradually add 1/3 of the milk to the egg mixture, stirring to combine. Add the egg/milk mixture back to the pan and remaining milk. Cook while whisking constantly. Scrape the corners and bottom of the pan to prevent scorching. Once custard begins to thicken, continue to cook for an additional 45 to 60 seconds. Add vanilla extract, if a vanilla bean was not used.

Pour custard into a clean bowl and cover the surface with plastic wrap or waxed paper to prevent a skin from forming.

Refrigerate until cold--up to 2 days. At this point, check on your custard. It should be the consistency of pudding. If it’s not, put the pastry cream back in a pot, add a little cornstarch (1 t or so) and cook slowly over medium heat until it thickens. Cool in the fridge.

Before filling eclairs, beat the heavy cream to stiff peaks and fold into the cold custard.

Choux Pastry
(from Martha Stewart’s Baking Handbook)

* 1 cup water
* 1/2 cup (100g) butter
* 1 tsp sugar
* 1/2 tsp salt
* 1 1/4 cup flour
* 4 eggs, plus 1 egg white if needed

Preheat oven to 340°F. Line 3 baking sheets with parchment paper.

Combine 1 cup water, butter, sugar, and salt in a medium saucepan over medium-high heat. Bring to a boil, and immediately remove from heat. Stir in flour. When flour is combined, return to heat. Cook, stirring constantly for 4 minutes. It is ready when it pulls away from the sides and a film forms on the bottom of the pan.

Transfer to the bowl of an electric mixer fitted with the paddle attachment, and mix on low speed, until slightly cooled, about 1 minute. Add eggs, one at a time, on medium speed, letting each one incorporate completely before adding the next. Add final egg a little at a time until the batter is smooth and shiny. Test batter by touching it with your finger and lifting to form a string. If a string does not form, the batter needs more egg. If you have added all the eggs and the batter still doesn’t form a string, add the extra egg white, 1 tbsp at a time, until it does.

Fill a pastry bag fitted with a 1/2-inch round or star tip with pate a choux batter; pipe out oblong shapes, about 3 inches long and 1 inch wide, onto prepared baking sheets at 2-inch intervals.

Bake until golden (this took a while, maybe 30 minutes. For crispier eclairs, which I prefer, poke a little hole in the side of the eclair 10 minutes before the end of the baking. Make sure the eclair shells are very brown and sound hollow when tapped.). Let cool on wire racks.

The pastries can be kept in airtight containers for 2 days, without filling.


When the eclair shells are completely cool, cut in half and pipe the custard cream in the middle. You can at this point put some berries in with the cream, or replace the top on the eclair and top with chocolate ganache (8 oz. chocolate, 1/2 cup heavy cream, melted together slowly over a double boiler until just melted).


My grade: A
Recipe grade: A- (it's hard to know when the eclair shell is baked enough)
Diagnosis: Worth making, though a multi-step process.

1.21.2010

Ka-ree

Korean (or Japanese, whichever) curry is not the prettiest dish. It's generally brown and gloppy looking with no hints of verdant green freshness in sight. Despite the plebeian gruel look, Korean/Japanese curry will have you salivating. It's in the realm of cheeseburgers and pizza - it's that level of cravability. It's a bastardization of a bastardization - heavy with thickeners and mild spiciness only vaguely reminiscent of Indian Curry. Curry came to Japan via the British during the Meiji era (think British Imperialism). Since then, the Japanese style of curry has become almost the national dish of Japan. There are restaurants that specialize only in this type of curry. It would be hard for me to choose a favorite kind of curry, but this version has a shot at #1.


AND it's probably one of the easiest things you'll ever make. I consider it a more involved ramen on the scale of ease of preparation. All it takes is a box of "S&B Golden Curry", some onions, carrots and meat (beef, chicken, shrimp, etc.), water, and a pot. Cut up some veg - I go really basic like the ka-re of my childhood, but the sky's the limit on what you can add. Then boil it all up, eat, repeat.

There are more complicated homemade kinds (my favorite being the kind that is stewed for 24 hours with apples and Daikon), but comfort needs to come quickly these days (law school *shakes fist*) so I have no problem with the boxed kind. People who know me are very confused right now.

Japanese Ka-re

1 large onion
2 carrots
2 yukon gold potatoes
3ish cups water (enough to cover the veg and meat)
1 box S&B curry (hot version please)
1 ribeye steak or chuck (or about 1 lb of whatever meat – if beef is desired, do NOT use NY strip b/c it's too dry, and if you're using shrimp add them during the last 3-5 minutes so they don't overcook)
1 T oil (canola or veg oil is fine, even preferred here)

Cut meat and vegetables into 1” pieces. Sauté in a pot with a tablespoon of oil for 5 minutes. Pour over enough water to cover. Bring up to a boil on high heat. Break up the curry concentrate into smaller pieces and melt in the pot. Let simmer for 20 minutes or until everything is soft and tender (beef takes a bit longer, I’d say about 30 minutes).

Serve over rice and grub down.

There is this weird phenomenon of restaurants in Japan that are themed like bathrooms - toilets specifically. You sit on toilets, eat out of mini toilets, the light fixtures are modeled after urinals. It’s a chain and people eat that shit up (pun SO intended). Curry is one of the most popular dishes to order and you can see why…


My grade: A- (used NY strip this time b/c it was all I had)
Recipe grade: A+
Diagnosis: Must try.

1.19.2010

Say...

Cheesemaking might be the most infuriating food project I’ve ever undertaken. I thought it would be so pastoral, even poetic to find farm fresh milk, apply a little know how and make a product that was arguably 1000% better than its parts. What a crock. It turned out to be a hair puller – like the nervous, pissed off pull-out-your-eyebrow-hairs-with-your-fingernails psychotic kind of irritated. The box (“Home cheese making” by Ricki Carroll) proclaimed five year old children could be parma prodigy and anyone could make cheese the first time and every time like a pro. This is in fact a damn dirty lie.

I consider myself a decent cook. I like to cook and do it often. Some dishes come out far better than others and I will reflect this variance in the “my grade” report on every recipe (based on my opinion and diners’ opinions). I don’t know why the hell I’m making myself worry about yet another GPA-esque number, but I guess I’m a glutton (for pun-ishment ahahaha, no.). The first time I tried my hand at this recipe, the curds didn’t properly form and I was left with murky green Bayoubend like whey and barf like strands of curd. YUM!


No whey.

I think this picture was supposed to make Houston look good.


The second attempt almost got there. The curds formed and I got to the stretching phase of the process. Then everything disintegrated into an overheated mass of grainy goo. This was salvaged in a strainer and became a sort of ricotta cheese. Tasty, but not mozzarella. Still, the show had to go on and I used it on my pizza dough. (recipe follows)

Caramelized Onion, Prosciutto, oven roasted tomatoes in garlic, mozz/ricotta disaster, fresh basil

The next day true frustration set in and I found another recipe online. Unwittingly thinking this was a totally different recipe, I went ahead with it. Later I discovered it was developed by the same folks that provided my two prior fails. This recipe makes a harder/firmer cheese. The prior recipe supposedly makes a softer, more pillowy cheese, but I wouldn’t know from personal inspection. This cheese was indeed rather hard as far as fresh mozz goes, but retained the gooey soft melting texture so sought after.

EZ Cheese
* 1/2 rennet tablet
* 1/4 cup cool, chlorine-free water (most bottled waters are chlorine-free)
* 1 gallon milk (2%, 1%, or skim)
* 2 teaspoons citric acid
* Salt, optional

Preparation:
Crush the rennet into the water and stir to dissolve. Pour milk into a non-reactive pot (no aluminum or cast iron). Place over medium heat. Sprinkle the citric acid over the milk and stir a few times. Heat milk to 88 degrees F. Milk will begin to curdle.

At 88 degrees F, add the rennet solution and continue stirring slowly every few minutes until the milk reaches 105 degrees F. Turn off the heat. Large curds will appear and begin to separate from the whey (the clear, greenish liquid).

With a slotted spoon or mesh strainer, scoop the curd into a large glass bowl. (If it's still too liquid, let it set for a few more minutes). Press the curds gently with your hand and pour off as much whey as possible. Microwave curds on high for 1 minute, then drain off all the excess whey. With a spoon, press curds into a ball until cool. Microwave two more times for 35 seconds each, and continue to drain the whey and work cheese into a ball. In the meantime, place the whey over medium heat and let it heat to about 175 degrees F.

When cheese is cool enough to touch, knead it like bread dough until smooth. When you can stretch it like taffy, it is done. You can sprinkle 1 to 2 teaspoons salt into the cheese while kneading and stretching it. The cheese will become stretchy, smooth and shiny. If it is difficult to stretch and breaks easily, dip it into the hot whey for a few seconds to make it warm and pliable. Then pick it up again and stretch it into a long rope. Fold over and stretch again. Dip in hot whey as needed to make the cheese pliable.

When the cheese is smooth and shiny (this takes just a few minutes), it is ready to eat. Shape it, then store in a solution of 2 teaspoons salt to 1 cup water.

Shapes:
To form the traditional ball shape: Fold the cheese into itself, tucking the loose ends into the bottom. This will create a smooth and tight surface to work from. Section a desired piece/size from the smooth mass and pinch it off by squeezing your fingers together around the base. Ta Da!

To fill with things: Roll the cheese out like a piece of dough to desired thickness in a vague rectangular shape. Fill with sundried tomatoes, caramelized onions, prosciutto and fresh basil (shown), fresh thyme, jalapenos, anything your heart desires. Roll, slice and eat.


H8 U Cheese
Yield: ¾ pound Mozzarella Cheese

1 Gallon milk (not ultra pasteurized)
1¼ c cool water (chlorine-free, if you want to be sure it’s chlorine-free, use distilled water)
1½ t citric acid
¼ rennet tablet (¼ tsp. if using liquid)
1 t cheese salt

1. Dissolve ¼ rennet tablet into ¼ c of cool water. Stir and set aside. Wrap the remaining pieces of tablet in plastic wrap and store in the freezer
2. Mix 1½ t citric acid into 1 c cool water until dissolved.
3. Pour 1 gallon of milk into your pot and stir vigorously while adding the citric acid solution
4. Heat the milk to 90°F while stirring
5. Remove the pot from the burner and slowly stir in the rennet solution with an up and down motion for approximately 30 seconds
6. Cover the pot and leave it undisturbed for 5 minutes.
7. Check the curd. It should look like a custard, with a clear separation between the curd and whey. If it is too soft or the whey is milky, let set for a few more minutes. The curds never set up hard for me, but did come together in step 9.
8. Cut the curd with a knife that reaches to the bottom of your pot. Try to make little 1”x1” squares if your curd is firm enough.
9. Place the pot back on the stove and heat to 110° while slowly moving the curds around with your spoon.
10. Take off the burner and continue slowly stirring for 2-5 minutes depending on how firm you want your cheese.
11. Pour off the floating whey.
12. (waterbath method) Heat a pot of water to 185°F.
13. Ladle your curds into a colander, folding the curds gently as you drain off the whey. Dip the curds in the colander in the colander into the hot water. After several times take a spoon and fold the curds until they start to become elastic and stretchable. DO NOT let the cheese exceed 135° or you will be left with something like this:


Instead of something like this:

I would recommend using a thermometer in the whey and in the cheese, just to make sure you aren’t overheating either.

14. When it is stretchable remove the curd from the liquid and pull like taffy. This stretching elongates the proteins. If it does not stretch easily, return it to the hot water for more heat.
15. Add some salt to the cheese and work it in. Stretch until smooth and shiny.
16. Form into different shapes and store in ice water immediately and leave for 10 minutes

Three attempts at 2 different recipes and 3 gallons of organic milk later, I was left with a hardened mass of mildly delicious mozz. Someday I will break out the rennet and citric acid once more, but I have to let my eyebrows grow back first.

Recipe grade: D
My grade: C+ for effort
Diagnosis: LAME.


My Favorite Thin Crust Pizza Dough Recipe
(I stole this recipe from a blog awhile back and don’t remember which, opps. Props to you, whoever you are)
makes 2 pizzas, 12 inches each

about 400grams of flour, just shy of 2 cups, Plus more for kneading
1 package of dry active yeast (7 grams)
1 teaspoon of sugar
1 teaspoon of kosher salt
1 tablespoon of olive oil
200ml (7 oz) of warm water.

Whisk all dry ingredients in a large bowl. Add the olive oil and the warm water and bring it together with a wooden spoon or spatula.
Transfer dough to the bowl of a stand mixer with the dough hook attached and knead for about 4-5 minutes on low speed. Dough will still be quite wet when done, but it will look smooth. The dough must be moist before baked to be soft and moist after baking. Dry dough = dry crust = yuck. Transfer dough to a lightly oiled clean bowl and cover it with a kitchen towel. Let it rest for about 1 hour in a dry, warm spot.

Preheat oven to 475 degrees with the pizza stone placed in the middle rack.
Punch down dough with your fist (flour your hands first). Transfer dough to a well floured surface and knead lightly, adding flour as necessary just until it comes together in a ball.
Cut dough in half, wrap excess dough if not using it right away and store in the refrigerator.

Prepare the pizza peel by sprinkling it with some flour and/or cornmeal (it'll make it nice and crispy)

The easy way to make ensure the pie won't stick to your peel is to use a piece of parchment paper like the original recipe instructs. I like to live dangerously and just throw the pizza straight onto the pizza stone from the floured peel. It works well and you don't have a singed mess of parchment paper to deal with in the end. However, if you feel more comfortable with the parchment method:

Cut a piece of parchment paper large enough just to cover the pizza peel. Dust it with lots of flour.

Roll pizza dough on a floured surface or directly on the parchment paper into a 12 inch round.

Top pizza as desired.
Using the pizza peel, slide the parchment paper into the pizza stone. Bake it for about 10 minutes or until dough is browned and topping is cooked. You'll know when it's done by how stiff the pizza is. If you can lift it like a piece of thick cardboard, it's done.

To remove the pizza from the oven, use a tong to pull the pizza back into the peel. You can bring the parchment paper with it or not, just remember to remove it from the oven.

Pizza Margherita (looks exactly like the other pizza, don't it?)

Recipe grade: A+
My grade: A- (I let the dough rise for a little longer than normal and the crust was a bit thicker than I usually do it)
Diagnosis: Delicious, but even shitty delivery pizza is tasty so this is not such a feat.

And just because he's adorable:
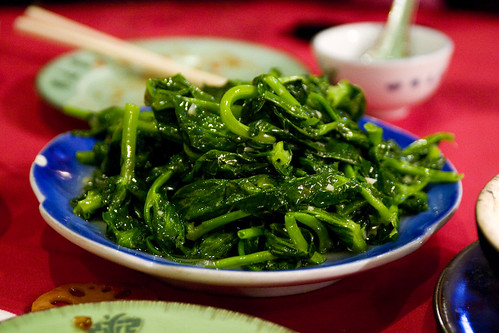
I have many photos from my dinner party this weekend (Roasted beet salad with horseradish and chive goat cheese, Brined pork with green peppercorn sauce, turnip/potato puree, beet greens with golden raisins, and mini chocolate eclairs), but I am far too behind on my crim law homework to spend another hour updating tonight. Formatting on blogger is a nightmare - shouldn't google know what's up by now? I mean, the photo posting is just ridiculously annoying. And why isn't this text input window larger? Why can't you post photos where the cursor is currently standing? For shame, blogger. For shame.

1.12.2010

Yay and Nay.

If you enjoy:

Mangoes


Cheesecake


Mushrooms


Cooked Carrots


Then you probably will not like:

This blog.

I try to like the aforementioned food stuffs, but I can't. For the simple fact that they're disgusting. Texturally. Visually. Olfactorally. Tasturally. Okay, so maybe I'm making up words and denying the clear fact that most if not all of the things mentioned above are by no means eyesores - but I just can't get over my distaste for them. I will continue exclude them from most of my dishes, but promise to occasionally test my taste buds to ensure they have not made some culinary evolution overnight.

Oh! But there is some good news - If you like:

Potatoes
Pass the carbs, please. I won't ask you nicely the second time.

All fish, but especially Halibut
(only Pacific - Atlantic is a sustainable faux pas)

Cheese
(despite my unfortunate lactose intolerance, which my dear bf tolerates when I eat copious amounts of cheese.)

Spicy Food
I'm Korean - we like it fiery.


Stir Fried Snow Pea Leaves in Garlic
The best part of winter (beating out s'mores, hot chocolate made with cream and 65% valrhona chocolate, chili, and all Christmas cookies - COMBINED)


Exact Measurements
I'm just not that kind of cook, hence the general lack of baking. Working on it though seeing as measurement seems to be an essential part of conveying accurate recipes to others.

Then...

We are culinary brethren and you will fit in quite nicely here. Here being, well, basically you and me so far. Readership is booming?

1.07.2010

Boil, Boil, Toil and...

New years resolutions are universally considered useless. They're little dreams that dreamers eventually forget come Spring - much like nocturnal dreams and the idea of marrying Lance Bass (hey, we were all 14 year olds once). This year, I'm going to turn my world all topsy turvy by actually fulfilling this year's new years resolution. Scoff if you must, but you're looking at the genesis of my 2010 resolution.

Zhee promise:
I, Christine the undersigned, hereby promise to make 3 posts a month for the next twelve months. In Edible Metamorphosis (EM), I want to show how food is a process. Seemingly simple ingredients can be transformed through careful(ish) manipulation to create a completely different product. My paltry panel of readers can expect many photos of EM's mascot (Jung Sa Ya, the 18 lbs. 2 oz. cat), overindulgence, photos + recipes, the occasional witticism, and the downfall of my other new years resolutions - weight loss and thriftiness.

- Ch.

Bon Appétit!

Twitter